Remedyforce Implementation: Five “hidden” Remedyforce features that make an admin's life easier
By Aslam Sayed, Senior Consultant, Cloudaction
Remedyforce Help Desk is the most robust “ITSM in the cloud” solution on the market today. And while it is designed for easy use for business users and IT, there are a number of “hidden” features – i.e., not visible in Remedyforce’s out-of-the-box default settings – that can make your life as an administrator a lot easier and your users a lot happier. In this blog, I’d like to highlight five “hidden” features that will make your Remedyforce implementation create even more business value.
Feature #1 – Add Notes in Pending Approval Records
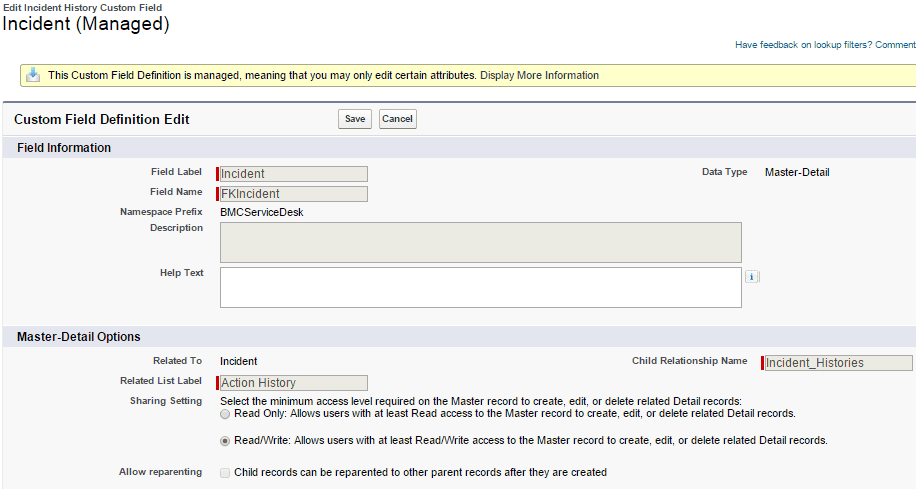
When an incident is submitted for approval, the incident record is locked, which means that the client or staff users cannot add notes to the incident because the default sharing setting for incident history requires that users have write access to the incident to be able to create history records. When the incident is sent for approval, the users do not have write access to incident and so they cannot add notes to incident. In certain scenarios, adding notes in pending approval records is a good thing since it saves the user time from having to manually edit record and add details. So, what if you wanted to give your users the ability to add notes to an incident? Well, you can do that! Here’s how.
- Login as Admin | Your Name | Setup | Create | Objects | Incident History | In Custom Fields & Relationships click Incident | Click Edit.
- In the Master-Details Options section, select the Read Only: Allows users with at least Read access to the Master record to create, edit, or delete related Detail records option | Click Save.
Feature #2 – Active Records for Optional Lookup Filters
The lookup window enables you to search for a specific record. When you click a lookup icon, a separate window is displayed with the list of active records. All the lookup fields except the status field are optional filters. What if you want to make it mandatory for the user to select only active records for the object? You can do that! Here’s one example:
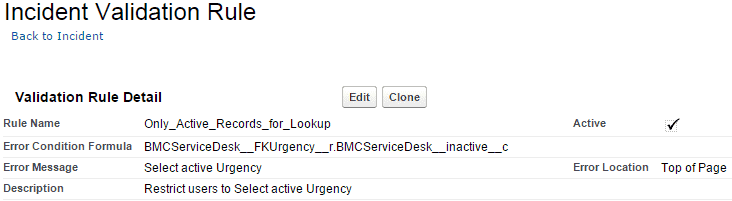
Create a validation rule for the Urgency field:
- Navigate to Setup | Create | Objects | Click Incidents.
- In the Validation Rules section, click New.
- In the Error Condition Formula editor, ensure that you have the following value: BMCServiceDesk__FKUrgency__r.BMCServiceDesk__inactive__c where BMCServiceDesk is the namespace of organization.
- In the Error Message field, type Select active Urgency.
- Select the Active check box and click Save.
Feature #3 – All Tasks Closed Controller Field
The All Tasks Closed Controller field is a system field that is enabled when all the tasks linked to a record (incidents, change requests, and problem) are closed. A system field is a field that is used in code and must not be shown on the layout of a form. But did you know you can enable this field in several workflows? You can!
The All Tasks Closed Controller field is enabled by code and used in the following workflows:
- Notify change request owner when final task linked to change request is closed
- Notify incident owner when final task linked to incident is closed
- Notify problem owner when final task linked to problem is closed
When the workflow is initiated, an email message is sent to the owner of a record when all the tasks linked to a record are closed.
![]()
This field comes in handy for multiple scenarios such as follow-up, tracking, escalation. You can also use it in triggers, workflows, and so on as per your business requirements.
Feature #4 – Configuring Change Advisory Board
Generally speaking, an organization’s Change Advisory Board (CAB) is a group of people representing users and IT – and sometimes third parties – who are responsible for assessing all high-impact Requests for Change from both a business and a technical viewpoint. Do you know that as an administrator, you can set up the CAB? Here’s how.
- Create users by using the profile that you have cloned from the Service Desk Change Manager profile. For a technical expert, select a profile that suits your business requirements.
- Create a queue and assign the required users to this queue.
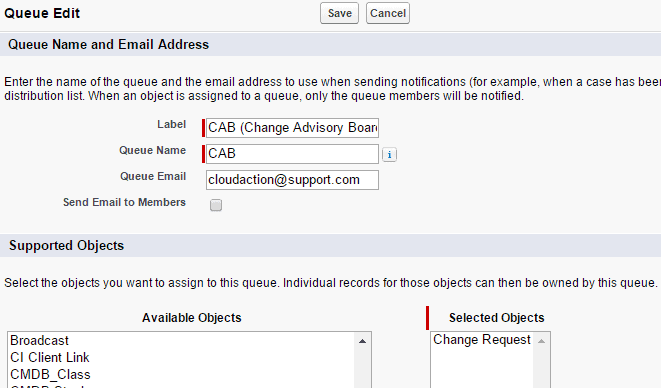
Before a CAB meeting, the CAB’s designated Change Manager can assign and queue up the change requests to be discussed in the CAB meeting. All the CAB members can access the change requests before or during the meeting.

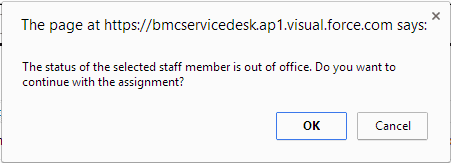
Feature #5 – Out of Office for Users
Did you know that you can set up an out of office status for a user who’s not available or out of office? Now you know! This status is shown in the Select From Staff window when any user is assigned an incident, broadcast, task, change request, problem, or release to a staff member, suggested expert, or member of the logged on profile.
To set the Out of Office status:
1. Click the Remedyforce Administration tab.
2. On the Home page, click the Manage Users tile, and from the menu select Add and Edit User.
3. Click the name of the user whose status you want to set.
4. In the BMC Remedyforce section, click Edit.
5. Select the Out of Office check box | Click Save.
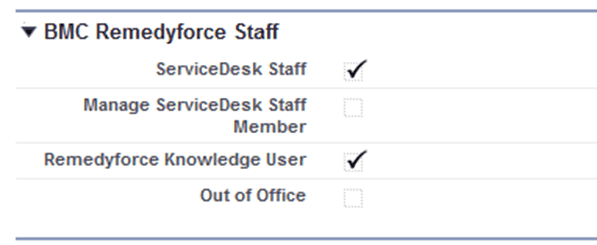
6. In the BMC Remedyforce section, click Edit and select the Out of Office check box.
With Out of Office status enabled, anyone trying to assign a ticket will get the message as shown in screenshot.
We hope these five “hidden” Remedyforce features gave you some new insight that you can immediately apply in your Remedyforce implementation. At Cloudaction, our goal is to help you get maximum value from your Remedyforce experience. We welcome your comments and suggestions. Please don’t hesitate to contact us at 1-844-2CLOUDA (1-844-225-6832) or via Ask Us NOW!, a complimentary service from Cloudaction to provide expert answers to your product capability, functionality, and implementation questions. We promise to respond to your inquiry or question within 24 hours.